


Markers are used to locate certain positions quickly. If you often find yourself
1. jumping to a specific position within a project, you should insert a marker at this position. You can also
2. use markers to make range selections (see “Using markers to make range selections in the Project window” on page 141) or
3. for zooming (see “Zooming to cycle markers” on page 136). Markers are located on the marker track.
There are two types of markers:
1. position markers and
2. cycle markers.
There are two places to edit markers:
1. Marker Window
2. Marker Track
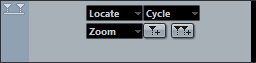
To open the Marker window, you have the following possibilities:-Open the Project menu and select “Markers”.
-Click the Show button in the marker section on the Transport panel.
-Use a key command (by default [Ctrl]/[Command]-[M]).
Adding, moving, and removing markers (Marker Window)•To select a marker, click on it in the Marker window.
•To edit a selected marker, click on it.
Select multiple markers by [Shift]-clicking or [Ctrl]/[Command]-clicking them.
•To add a position marker, open the Functions pop-up menu and select the “Insert Marker” option.
A position marker is added at the current project cursor position on the marker track.
•To add a cycle marker, open the Functions pop-up menu and select the “Insert Cycle Marker” option.
This adds a cycle marker between the left and right locators on the marker track.
•To move one or more markers to a specific position, set the project cursor to this position, select the markers, and select “Move Markers to Cursor” from the Functions pop-up menu.
You can also move markers by entering the new position numerically in the Position column. If a cycle marker is selected, the Move operation affects the cycle marker start position.
•To remove a marker, select it and select the “Remove Marker” option from the Functions pop-up menu.
The marker trackThe marker track is used for adding and editing markers.
To add the marker track, select Marker from the Add Track submenu of the Project menu.

Editing markers on the marker trackThe following editing functions can be performed directly on the marker track:
•Adding position markers “on the fly”.
Use the [Insert] key (Win) or the “Add Marker” button in the track list for the marker track to add position markers at the current cursor position during playback.
•Adding a cycle marker.
Clicking the “Add Cycle Marker” button in the track list for the marker track adds a cycle marker spanning the area between the left and right locator.
•Selecting markers.
You can use standard selection techniques like a selection rectangle, or use [Shift]-clicking to select separate markers. When selecting markers on the marker track, they are also selected in the Marker window.
•Drawing in position markers.
By using the Draw tool, you can create position marker at any position on the track. If Snap is activated on the toolbar, this determines at which positions you can draw markers.
•Drawing in cycle markers.
To draw a cycle marker range, press [Ctrl] and use the Draw tool. If Snap is activated on the toolbar, this determines at which positions you can draw markers.

•Resizing cycle markers.
Select a cycle marker by clicking on it. Two handles appear at the bottom of the start and end events. If you click and hold one of the handles you can drag the event left or right to resize the cycle marker. This can also be done numerically on the info line.

•Moving markers.
Click and drag to move the selected markers. You can also edit marker positions on the info line. As usual, Snap is taken into account.
•Removing markers.
This is done exactly the same way as for other events, i.e. by selecting them and pressing [Back], using the Erase tool, etc.
1. jumping to a specific position within a project, you should insert a marker at this position. You can also
2. use markers to make range selections (see “Using markers to make range selections in the Project window” on page 141) or
3. for zooming (see “Zooming to cycle markers” on page 136). Markers are located on the marker track.
There are two types of markers:
1. position markers and
2. cycle markers.
There are two places to edit markers:
1. Marker Window
2. Marker Track
To open the Marker window, you have the following possibilities:-Open the Project menu and select “Markers”.
-Click the Show button in the marker section on the Transport panel.
-Use a key command (by default [Ctrl]/[Command]-[M]).
Adding, moving, and removing markers (Marker Window)•To select a marker, click on it in the Marker window.
•To edit a selected marker, click on it.
Select multiple markers by [Shift]-clicking or [Ctrl]/[Command]-clicking them.
•To add a position marker, open the Functions pop-up menu and select the “Insert Marker” option.
A position marker is added at the current project cursor position on the marker track.
•To add a cycle marker, open the Functions pop-up menu and select the “Insert Cycle Marker” option.
This adds a cycle marker between the left and right locators on the marker track.
•To move one or more markers to a specific position, set the project cursor to this position, select the markers, and select “Move Markers to Cursor” from the Functions pop-up menu.
You can also move markers by entering the new position numerically in the Position column. If a cycle marker is selected, the Move operation affects the cycle marker start position.
•To remove a marker, select it and select the “Remove Marker” option from the Functions pop-up menu.
The marker trackThe marker track is used for adding and editing markers.
To add the marker track, select Marker from the Add Track submenu of the Project menu.
Editing markers on the marker trackThe following editing functions can be performed directly on the marker track:
•Adding position markers “on the fly”.
Use the [Insert] key (Win) or the “Add Marker” button in the track list for the marker track to add position markers at the current cursor position during playback.
•Adding a cycle marker.
Clicking the “Add Cycle Marker” button in the track list for the marker track adds a cycle marker spanning the area between the left and right locator.
•Selecting markers.
You can use standard selection techniques like a selection rectangle, or use [Shift]-clicking to select separate markers. When selecting markers on the marker track, they are also selected in the Marker window.
•Drawing in position markers.
By using the Draw tool, you can create position marker at any position on the track. If Snap is activated on the toolbar, this determines at which positions you can draw markers.
•Drawing in cycle markers.
To draw a cycle marker range, press [Ctrl] and use the Draw tool. If Snap is activated on the toolbar, this determines at which positions you can draw markers.
•Resizing cycle markers.
Select a cycle marker by clicking on it. Two handles appear at the bottom of the start and end events. If you click and hold one of the handles you can drag the event left or right to resize the cycle marker. This can also be done numerically on the info line.
•Moving markers.
Click and drag to move the selected markers. You can also edit marker positions on the info line. As usual, Snap is taken into account.
•Removing markers.
This is done exactly the same way as for other events, i.e. by selecting them and pressing [Back], using the Erase tool, etc.
-From Cubase Elements 7 Operation Manual - Using Markers (P135)